Showing posts with label creativity. Show all posts

Wednesday, June 22, 2016

It's Finished! // 1950's Wrap Dress

Its Finished! // 1950's Wrap Dress
Hello all! Seems like just about every time I hunker down to type up one of my piling up posts, something comes up and takes up my free time! So its a wonder to me at all that I even have this particular post to share! You see, I whipped out this darling dress pattern in just one afternoon this past Saturday!

Saturday, March 22, 2014

Something Different | DIY Herbal Hair Spray


Happy Saturday!
A while back we mentioned our love for making our very own hair spray, asking if you would appreciate a tutorial on how we make it. Since there was such a great response I made sure to take photos as I made it this last time.

If you are like me, you want to make sure to take the very best of care of your hair, skipping chemicals as much as possible. Though it was never an issue before, I have been battling breakage with my hair these past couple of years. As I read and researched on how to best remedy the awful results, I came across one tip that is not spoken of as often- how much hair spray can damage your hair. It just happen to be that I had been using more of it during this time- go figure!

I am one who loved the canned stuff so much more than the squirt bottled kind. So at first I thought "Uhm I'll just keep on using my natural (store bought) bamboo stuff- just not as much."  But I decided to try it, despite my lack of comfort concerning having to use a squirt bottle instead. And since this recipe is so effortless, I am sure you nature lovers and DIY-ers will get hooked as I did!

Let's get started!

Wednesday, January 29, 2014

Vintage Pattern Haul

Hello ladies! After talking with a dear sewing friend I decided to share some wonderful patterns that I came across at a thrift shop a few weeks ago.I am one who scavenges through the patterns at thrift stores.But on this particular day my Mom beat me to the treasure bins, because I was, ah, in the privy...
Any-who, I dashed to her side at her beckoning to find a small, fabulous haul of vintage patterns, be still my soul~ in my size! I am so happy! It is not every day you can spree on such a great selection, unless of course you only pay 19 cents a piece as I was able to!

Without anymore drama, let me get on to sharing with you what I ended up with...


These first two feature a ladies suit and four differing designs of night gowns from the late 60's.
I confess I am more thrilled with the nighty pattern than the business suit. But since it was completely intact and had such nice color, I decided to spend the extra few cents for it...and if I ever get around to starting an Esty shop I could just post it up to sell.
These two are just your practical goodwill bin pattern finds, but they both had such nice ideas for your average ruffle hemmed skirt I decided to throw them in. Plus they excite me for contra dance clothes. :)
                     Another nighty and some simple high waisted skirts...The best I have saved for last.

Now my dears we are getting to the goodies! This little number on the left is a 70's style pattern.Though I am not a fan of either that era's style or fad, I thought the shirt with the coordinating skirt was a fabulous idea! This will be a great outfit for the fall.I can see it working the 40's nicely.
We are going to skip over to the right here and look at this mail order pattern from the 40's...
It is so sweet to find patterns like this one with notes from the original seamstress intact. It makes you wonder what she was like and who she was. I love a good story of vintage mystery.
Oh, and the pattern is of what has been illustrated on it's cover.Such a fabulous blouse!
This dress pattern...I am probably the most eager to make.I am almost sure that I have seen it on Esty before, but have been unable to find it again since purchasing this copy.If you zoom in a bit you will notice the layout in the left hand corner.The cut of the shoulder and sleeves are what make this pattern special and unique to me. I can't wait to find just the right fabric for this dress! Do you know anything about this style?
I am guessing it to be from the 50's.
Here we have another mail-in (which I have yet to uncover what is inside- naughty me) and this pattern that leaves me confused.The style looks to be from the 40's or 50's but the the printed price make me think older. What do you think?

And these my dears, have been saved for last because of their wonderfulness. I have already bought a yellow calico to carry out the fabulous 50's blouses.But do you think that I will ever be able meet such a match for the 40's suit as shown?! It yells out to me from my sewing corner, pleading to be make once again. Maybe one day I will find something to meet your glory my dear one, until then I will keep you in safe keeping for that momentous day.

Have you found any patterns lately?
Which pattern do you like the best?

May all your pins lay straight!
Cassie
the Elder sister and Writer


Monday, January 27, 2014

It's Finished (Vol.4) | How to Make an Apron Style Tichel out of a 'Dress'


Hi ladies! As I assumed would happen, our worship services were cancelled yesterday. Leaving no outfit to share with you today, and I, with yet another afternoon for sewing.

SO. I am sure you all have seen dresses like the one shown below.The little dress/tunic kind that always, beyond a doubt, have a small amount of fabulous fabric incorperated into them. If you are like me you have probably thought "This fabric is gorgeous, but what could I make out of it...There is hardly anything to work with!"


                  Well, since I had all day yester-eve, I pulled out my pattern basket to put together a list of fabric for future projects and my small stack of clothes to repurpose. Amongst the pile was this 'dress' my mom found a month or two ago at a thrift store to make something out of- look at the fabric combo- too cute to pass up! When it hit me- the shape is perfect for a apron style headscarf. I know, just crazy since I have been such a nut about scarves lately. :)


For those of you who know I have been talking about coverings this past week, I am sure you know the style, but just in case (I don't want you to have no idea of what we are making) so here is a finished one.It is basically the shape of a small apron, hence the name.This one is slightly folded, but you get the idea.
To see how neat these look worn click here.
 
So now you know the shape that we will be creating so you may not even need this little walk through...It is fabulously easy! Here we go with my method.

                                               First cut off the front (or back) of the dress and the ties along the seams.

The dress I was using has a neat little strip of contrasting fabric at the hem which is perfect for this project. You want to fold and pin that back if it is too wide for your taste.


Next, measure from where you want your covering to lay (the top of your hair line) to the back of your neck plus about 2-3 inches. For me this was 18" with SA.
Your next measurement will be around the crown of your head plus 1" for SA. For me this was 24".

You now should have a slight square of 18" (from your hair lie to the middle of your neck +SA) by 24" (the measurement all the way around your head.)

                                                           Now you are going to iron everything down.

My ties were 35" long which I did not do any measuring for....they turned out to be the perfect length.
This is where the style can get really pretty.Pin lace (or anything you like) down the ties so that when you lay the ties over your head they lay accordingly.

                                                   Serge or create a small hem around the three raw sides.

                                                      Pull through the ends as usual if you are serging.

Top stitch the part you folded over for the crown.You could also add the lace and flounces now if you want them along the top also.Just lay lace from end to end and sew! This is how most of them are made.It looks so radiant!

                                                                     This is how it should now look!
To put it on (I will do a video tutorial later) take the scarf over your head so that the crown is where you want the edge to lay and the ties hanging over the front of your shoulders.Throw the ties over your shoulders and cross them in the back over the hanging (apron skirt) part.Bring the ties over your head and back down.Tie them and tuck everything under!


                      And there you go! Hopefully this gave you some inspiration and benefited you!
                                                          Did this help some of you out?
                                             Was your Church service cancelled yesterday?

                                                                          TTFN!
                                                                         Cassie
                                                         the Elder sister and Writer 

p.s. For those of you who were waiting for my sewing project I wrote of last week, this is by no means        taking it's place. I will still be sharing that project. I can't wait!


Friday, December 6, 2013

The Finishing Touches // Gift Wrapping

Hey y'all!
As I have been reading through my blog dashboard this week, a lot of my fellow bloggers have put lists of gift ideas together, inspiring people to find a lasting, thoughtful gift for that "hard to buy for" person. Not to mention being thrifty while doing so! But, what do people see first is how the gift is presented, the wrapping. This, for me, sometimes, can be more delightful than the treasure inside! There are so many beautiful packaging ideas. The thought that was put into it can be part of the gift, something you can create your self, even if the item is not.

The past couple of months I have come across some super fabulous ideas, so to get in the spirit of things, here I am to share them with you! If you are anything like me, you want your gift to stand out to the person who is recieving it, and bring their style right into the gift. For me it is shabby, vintage, details. SO, as you look through, remember that changing a color or product can give a whole new look to the finished result.
                                      newspaper and doily gift bags for the family at Christmas
                                                                                   
This idea can really be personalized by the shape of the cutout. I really like the thought of using newspaper to stencil onto! And, if you could bring yourself to do it, an old book?
                                                                                   
                                                                           
This is such a great idea! Being both a sewer and crafter, this is right up my ally! I will be using this for some of my smaller gifts for sure! Love this! There are so many shapes you could make!


This is also a neat idea. Make sure to keep your eyes out for tattered maps while thrifting this season!
Perfect for Dads and brothers!  :)
                                                                                
                                  
                                                       How do you make your gifts bring delight to the eye ?
                                                                             Which idea do you like the best ?
                                                      Do you think you will use them this Christmas season ?

                                                                                             Ta-Ta!
                                                                                             Cassie

P.S.  Oh, happy fiftieth post!  We are so blessed by all of you! We have made many kindred spirits among
        you! :)  Hoping to bring many more posts your way, filled with the joy of Christ!


Friday, November 22, 2013

~ A Tour of Our Room Decor ~


Hello, hello, hello!   Today was filled with getting a fund raiser (for mission trip) going and following the national Bible Bee with our live stream cast! It is so amazing to see all the young people compete! Their hard work for such a worthy cause is just am.az.ing! We had a few blogging friends who competed and many who attended.  Make sure to check it out!

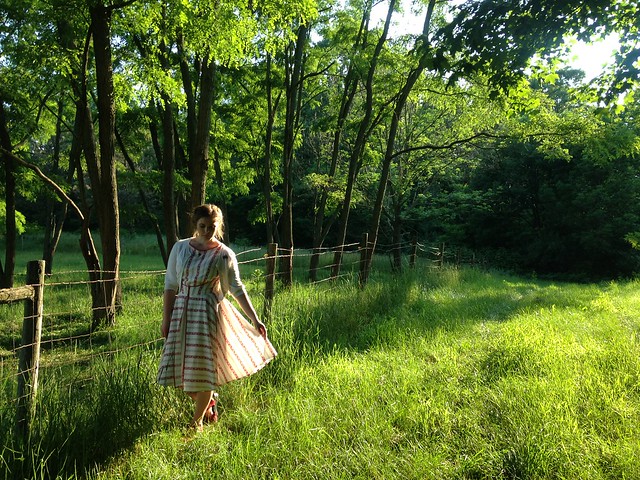
SO, today we have a unique post to share with you- a  tour of our (Rebekah and my) room's decor!
Charlotte from The Boyer Family Singers did a post of her own room not too long ago and I requested if I could use her wonderful idea for a post of our own.  She is so sweet to comply with us!  You can view her post here. It was so fun to see what she did to make her space her own style. I am sure you will fall in love with their beautiful blog, glorious photography, and lovely writing! Make sure to give them a follow!

Rebekah and I worked up from the studs to have our room- dry-walling, painting, wall-papering, trimming, and yes, even our horrendous pink carpet.   :)  Up till about three years ago, all five of us kids  were in one room! We are currently on our second addition. Our home was one of a row of migrant houses in the 30's. My Dad has lived here for 22 years- we have never moved...just kept adding on to our once 550 square foot home!     :)
But, don't worry, I am just going to show you what we have done till now- in our room. I am sure if we make any changes we will send them your way!

So take this tour with us as we show you all our put together, uncluttered, style of vintage antiqueiness! :)

Here we have a jewelry armoire which we not only keep our jewelry in the top three smaller drawers but our headbands, hair accessories, (flowers and such) and barrettes in the bottom two larger drawers, that way we have all of our 'pretties' in one place.   :)
Then of course the things up top, brushes/comb, plain bobby pins, my Burt's Bees everything and a few antique necessities, shoe hook, talcum powder, perfume, etc...
                                                     This is what we have above on the left hand wall. Also a large mirror
                                                                                 which I neglected to take a photo of. Oops.
 Down below I have some old toys and a few dried flowers hanging, and also a large beehive my Dad found.   :)


This is our closet door. I added a few delicate baby/doll clothes to our all-ready wonderful (free!) door.
                     On either side of our closet are these shelves where we trade little things off and on.


                                                                                Just a few things we like by our door.


 I put an old tablet in the window part of our door- we write 'to do' lists or the events of the day on it.

An old pitcher with our umbrellas that are too old and tattered to be used. Among  other things.

 THIS is our main entrance door. Don't you love it!? Our Dad (since he is a builder) is always bringing things home from remodeling jobs- he got both of our doors for free! We were thrilled!
                                                     These are some of my bouquets of flowers from my 16th. birthday.
                                                     Note how I tacked a tin teapot to look like it was watering the roses.
 Change jar (mission fund) a copy of the Declaration and a large spear head that I found while digging the trench for our farm's water pump!    :)
                                                                                                  On top of our wardrobe.

                                                                                 What you see of our wardrobe upon entering.
                                                                     A bit of my nature collection.Yup, that is a real bumblebee!

                                                               My sewing corner, just about my favorite spot in the house!
                                                                                    And Daisy, my sewing machine.     :)
                              Pictures that hang over my sewing area: me, my grandmother, and a little sampler.
                                                                                        My sewing stock!

                                                                                                   Between the two..

                                                                                                           My bed frame.
                                                        Note how we put things behind the chair-rail. And more dried plants.   :)
                                                                                                      My hope-chest at the end of my bed.
                                                                                            Little junk pot of 'just in case' things.
                                                                                                      ~ Books ~
                                                                                                      My books.
                                                                                                     Note the crock.
                                                                                                    Our nightstand etc.

                                                                                                           Bek's bed.
                                                                                                            Above her bed.
                                                                                                           Note the 'ring' of keys.
                                                                                                  ...On the long wall by her bed...
                                                                                                                Bek's current books.
                                                                                                                Note the tin.
 This is a handy tip for you, I highly dislike cords hanging around- just gather them up and clasp with a clothespin!
                                                           On Rebekah's chest we keep our collection of antique books.

                                                                                                        On the window sills.


 We still have a few things to add, like curtains and replacing the knobs on the wardrobe, all in due time!

Well, I've got a long day tomorrow and since these pictures took SO long to upload I better hit the hay!

Hopefully we can squeeze in some time for the rest of the Bible Bee tomorrow!

                                                                I hope you all liked this post and got a few ideas!
Thanks again Charlotte for having such a fun idea and allowing us to use it! Many blessings to you dear!

                                                                                    Do you have any connections with the Bible Bee ?
                                                                                    How have you styled  your room ?
                                                                                    Have you done any building onto your home ?
                                                                                    Have you read any of the books shown ?
                                                                                    Make sure to let me know!
                                                                                                     TTFN!
                                                                                                 ~ Cassie ~